Task Management
The task feature in a Room lets you manage the action items a client project requires and share progress with your team and customers.
In this article: Creating tasks / Status and priority / Assignment / Gantt chart / Categories, labels, and subtasks / Cross-Room
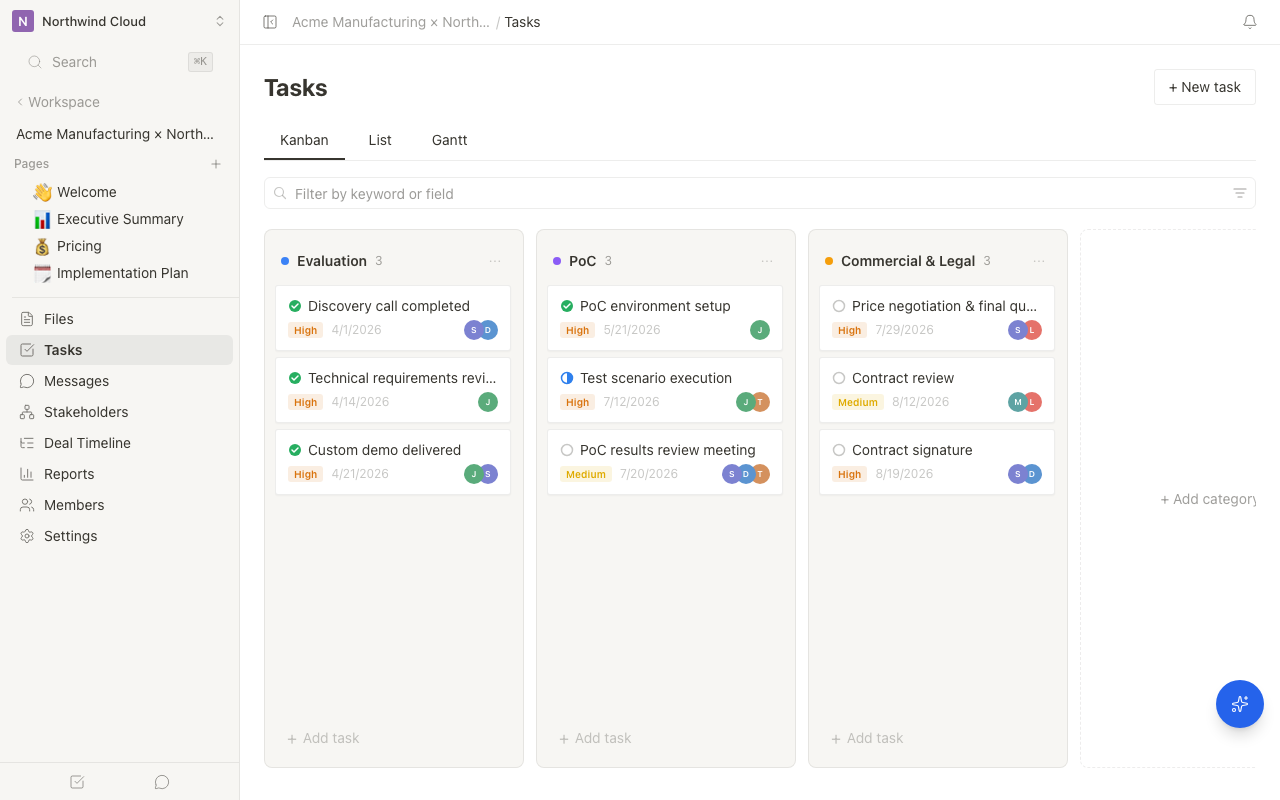
Creating a task
- Open the "Tasks" tab in the Room
- Click "Add task"
- Enter the task name, due date, and assignee
- Click "Create"
You can also embed a task list within a page by adding a /task_list block in the page editor.
Generating task suggestions with the AI Agent
The AI Agent can suggest candidate tasks based on the conversations in a Room, submitted information, the client project phase, customer requests, and commitments made by the project owner.
- Open the AI Agent in the bottom-right of the Room
- Ask it to "suggest the tasks we need before the next meeting"
- Review the task name, assignee, due date, and supporting evidence in the approval card
- Check only the candidates you need and approve them
Tasks suggested by the AI Agent are not added to the Room until you approve them. You can also approve just some of the candidates.
Managing status
Tasks have the following statuses.
| Status | Description |
|---|---|
| Not started | Work has not yet begun |
| In progress | Currently being worked on |
| Done | The work is complete |
You can change a task's status on the kanban view by dragging and dropping the task card.
Setting priority
You can set a priority for each task.
| Priority | Use case |
|---|---|
| High | Actions that require immediate attention |
| Medium | Standard tasks with a due date |
| Low | Things to handle when you have time |
Assigning a task
You can assign any member of the Room as a task's owner. When you set an assignee, that member receives a notification.
- Click the task card to open its details
- Choose a member in the "Assignee" field
- Set a due date if needed
Cross-Room tasks
From the "Tasks" menu in the sidebar, you can review tasks across all of your Rooms at once.
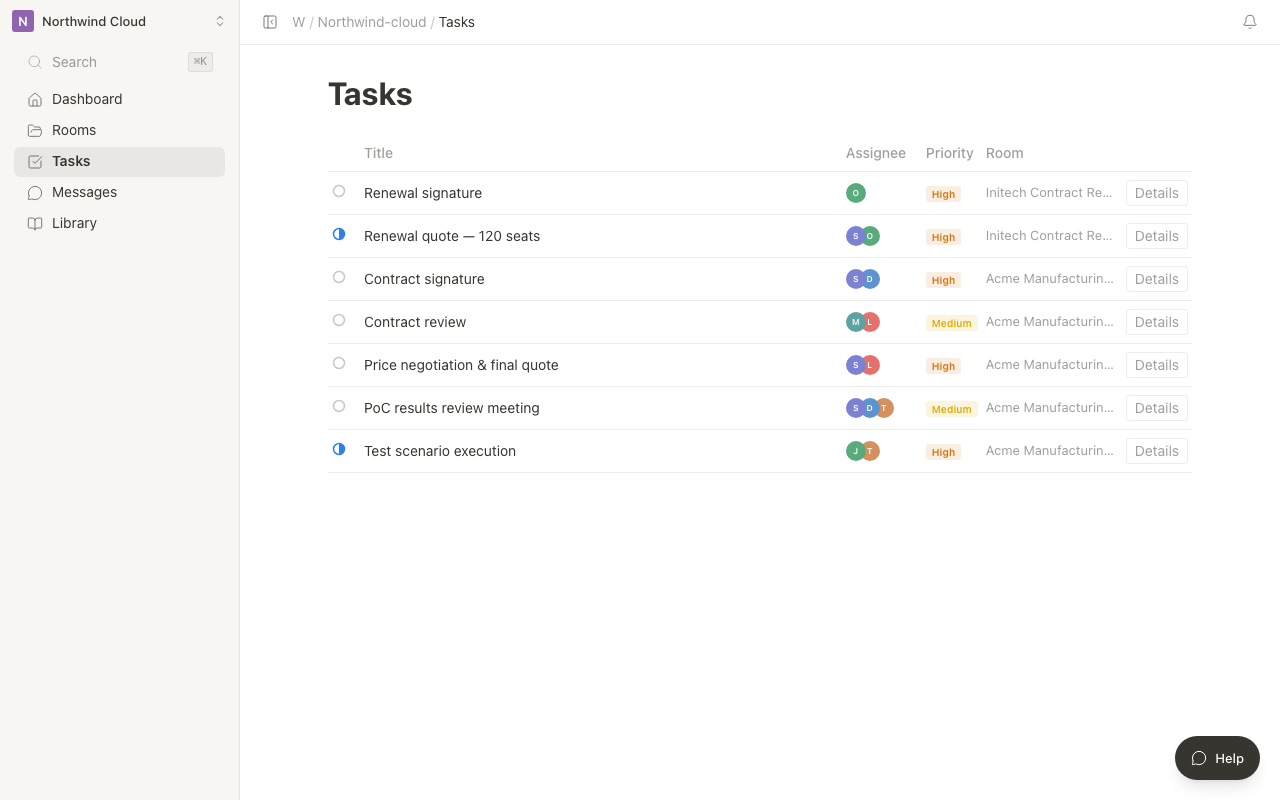
| Filter | Description |
|---|---|
| Assigned to me | Show only the tasks you are the assignee for |
| Status | Filter by Not started / In progress / Done |
| Priority | Filter by High / Medium / Low |
Tasks that are due soon also appear on the dashboard. Use this to avoid missing important actions.
Gantt chart view
Switch to the "Gantt chart" button at the top of the Tasks tab to display tasks as a timeline (horizontal bar chart).
What it shows
| Item | Description |
|---|---|
| Task name | Category and task name shown in the left column |
| Duration bar | The period from start date to due date shown as a horizontal bar |
| Dependencies | Predecessor and successor relationships between tasks shown with arrows |
| Progress | Completed tasks change the bar's color |
| Week header | In the week view, headers show the month and week-of-month, such as "9/W2" |
How to use it
- Drag a bar: Move the task's duration
- Drag the end of a bar: Change the start date or due date
- Click a category row: Expand or collapse the category
While the Gantt chart is shown, the page expands to the full width of the screen. A task must have a start date and due date set to appear on the Gantt chart. Tasks without them appear in the list, but no bar is drawn on the chart.
You can switch between kanban, list, and Gantt chart with tabs. Use kanban for status management and the Gantt chart for deadline management to get the most out of each.
In-page task lists
Selecting /task_list from the slash menu in the page editor embeds a task list within the page. It's handy when you want to write action items directly inside a proposal or meeting notes.
In-page tasks also sync to the Room's Tasks tab and to cross-Room tasks.
Classifying tasks with categories
By creating task categories, you can organize tasks into columns on the kanban view.
- Select "Add category" from the header menu on the Tasks tab
- Set a category name and color
- Drag and drop tasks to move them between categories
You can reorder categories by dragging them. When you delete a category you no longer need, you can move its tasks to another category.
Organizing tasks with labels
Add colored labels to tasks to classify them visually. You can set up to 20 labels on a single task.
- Click the task card to open its details
- Click the "Labels" field
- Select an existing label or create a new one
Labels are managed per Room. You can freely set the label name (up to 50 characters) and color.
Breaking work down with subtasks
When you want to split a large task into smaller steps, use subtasks.
- Click the task card to open its details
- In the "Subtasks" section, click "Add" to create a new one, or "Choose an existing task" to make a task in this Room a subtask
- If creating a new one, enter a subtask name and create it
"Choose an existing task" does not list tasks that already have a parent or that have subtasks of their own (subtasks are one level deep).
Subtask completion is shown with a progress counter (for example, 2/5). Click a subtask's checkbox to toggle it between complete and incomplete.
Commenting on a task
Leave comments on a task's detail screen to discuss it with teammates.
- Click the task card to open its details
- Enter a message in the "Comments" section
- Post it with
Cmd + Enter(Mac) or the submit button
You can delete your own comments.
Attaching files
You can attach files related to a task.
- Click the task card to open its details
- Click "Add file" in the "Attachments" section
- Upload a new file or choose an existing file in the Room
Major file formats are supported, including PDF, images, Office documents, video, and audio (the per-file limit varies by your plan).
Related articles
- Using the Page EditorHow to create and edit pages with the block editor, plus page visibility and editing permissions
- Understanding the Engagement ReportHow to use the report to see what customers confirmed, when, and for how long
- Using TodayHow to check today's meetings and todos on one screen.
- Agent InboxHow to approve or reject pending proposals across Rooms from the workspace inbox.