Plan and Billing Management
This article covers checking your plan, upgrading, billing, and usage. Only workspace administrators can open these screens. Everyone else sees "You don't have permission."
Plan
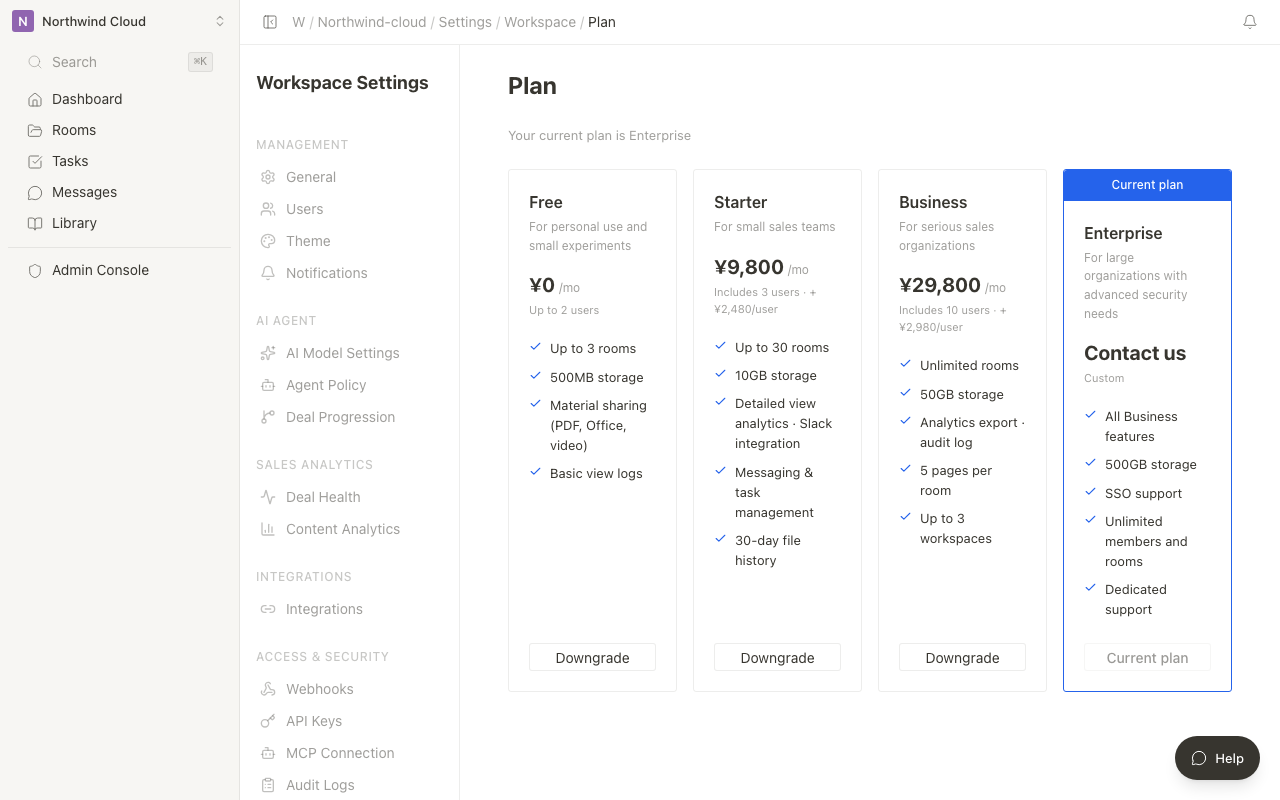
- Click the workspace name at the top of the sidebar to open the menu
- Select "Settings"
- From the settings sidebar, open "Plan"
- You see "Your current plan is ○○" and a comparison of Free / Starter / Business / Enterprise
Each plan name is a heading. The current plan is marked "Current plan." Upgrade, Downgrade, and Contact (Enterprise) are the actions. While checkout opens, the button says "Redirecting…"
Plan comparison (in-app)
| Item | Free | Starter | Business | Enterprise |
|---|---|---|---|---|
| Price | ¥0/mo | ¥9,800/mo | ¥29,800/mo | Contact us |
| Rooms | Up to 3 | Up to 30 | Unlimited | Unlimited |
| Storage | 500MB | 10GB | 50GB | 500GB |
| Members | Up to 2 | 3 included, extras available | 10 included, extras available | Unlimited |
| Other | File sharing and basic view logs | Detailed analytics, Slack, messages, tasks, 30-day file history | Export, audit logs, 5 pages/room, 3 workspaces, Agent Studio | Everything in Business, SSO, dedicated support, custom code skills, Agent SDK |
Annual plans are about 20% cheaper than monthly plans.
Upgrade your plan
- Open "Plan" in Settings
- Click "Upgrade" on the plan you want
- Enter payment information on the Stripe checkout screen (first time only)
Downgrade your plan
- Open "Plan" in Settings
- Click "Downgrade" on the plan you want
- Review the confirmation dialog
- Changes between paid plans continue in the Stripe portal
If current usage exceeds the lower plan's limits, the dialog warns you. Reduce Rooms or members first. Existing data is not deleted automatically.
Billing
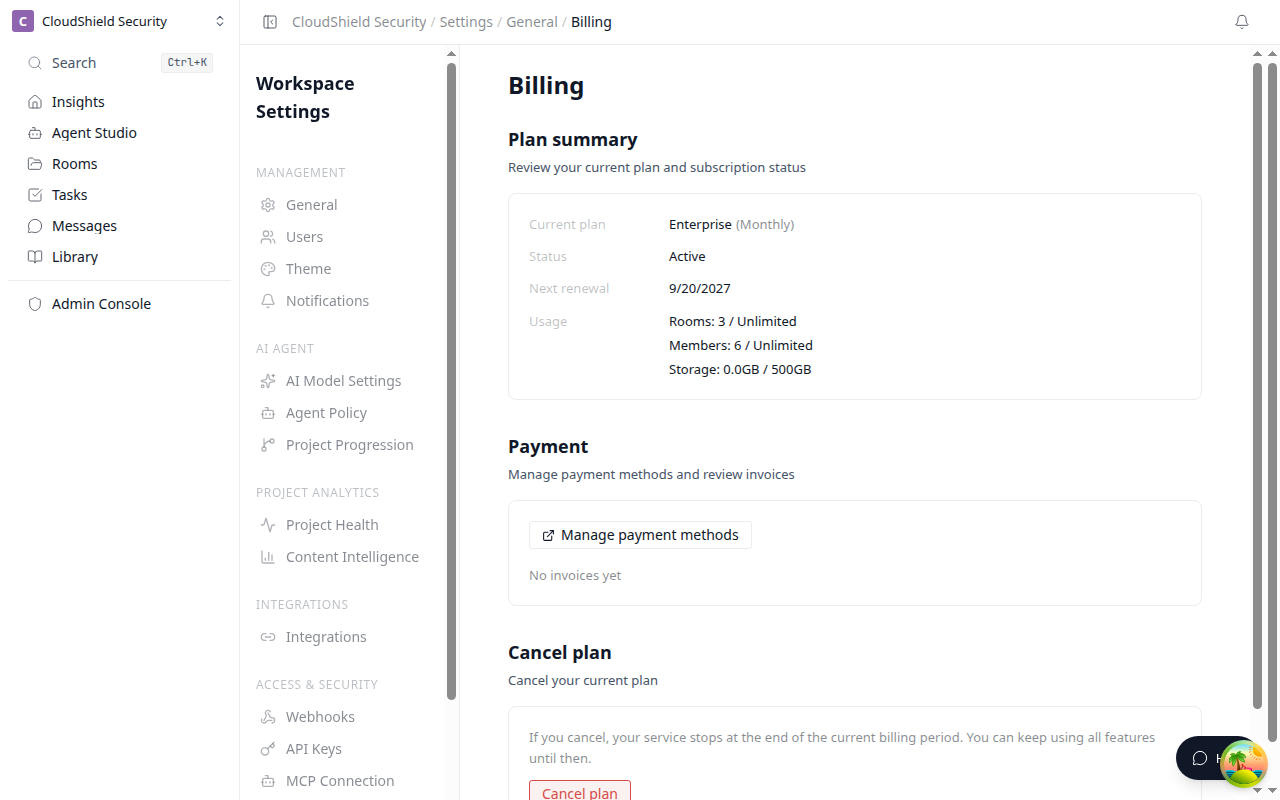
- From the settings sidebar, open "Billing"
- Review the current plan, status, next renewal date, and usage
- Click "Manage payment method" to open Stripe in a new tab
- Review invoice number, date, amount, and status in the invoice history table
- Use "Download PDF for “number”" to open the invoice PDF
To cancel, click "Cancel plan," then choose "Don't cancel" or "Cancel plan" in the confirmation banner. Cancellation takes effect at the end of the current period.
Payment management is unavailable on the Free plan. For billing inquiries, contact support.
Usage
Usage and limits, extra storage, extra user slots, and AI credits are on "Usage" in Settings. That is separate from Theme. See also Theme and usage.
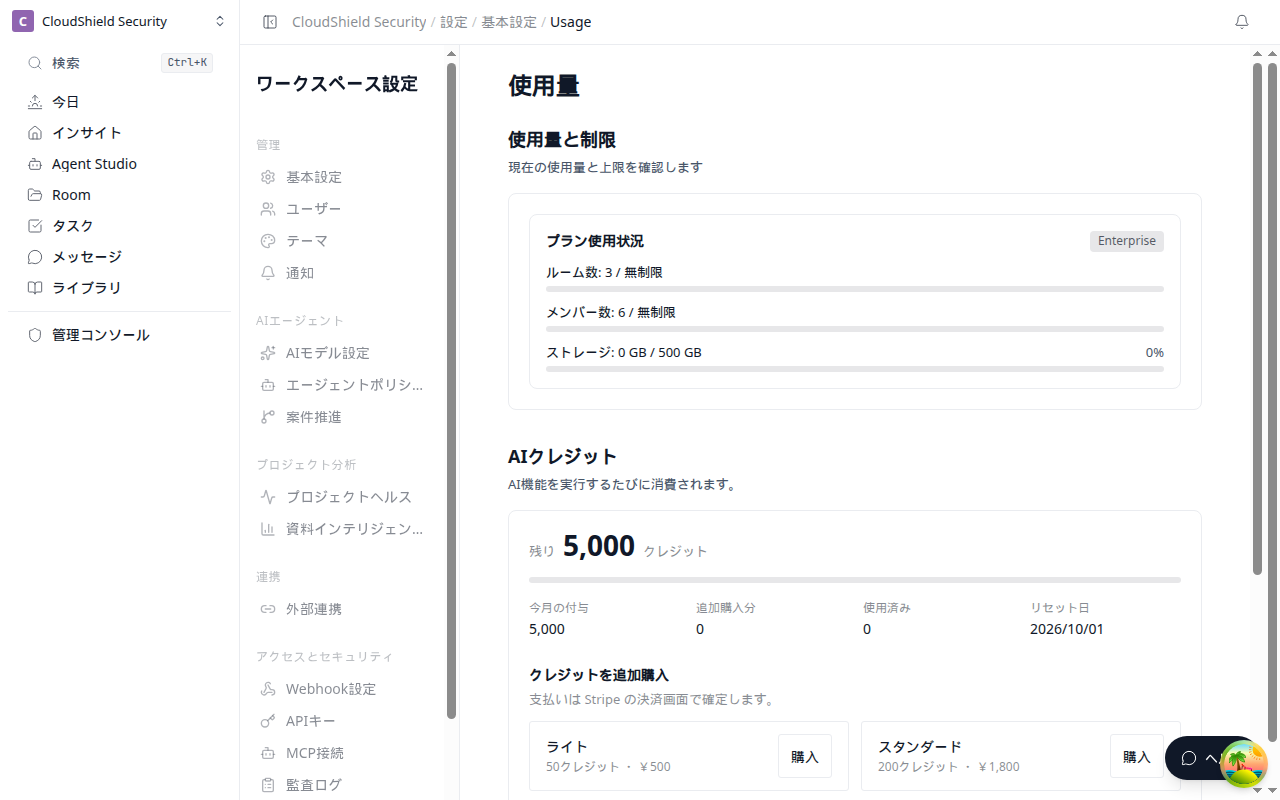
- From the settings sidebar, open "Usage"
- Review the bars for rooms, members, and storage
- On a paid plan, use "Add +10GB" or "Add user slots" for add-ons
- Buy extra AI credit packs with "Buy"
At 80% usage the page says usage is high. At 90% it says you are approaching the limit. Color is not the only signal. Add-on confirmation uses a quantity dialog.
When usage reaches the plan limit, creating new Rooms and similar actions are restricted. Credit checkout opens Stripe in the same tab.