Managing Workspace Settings
Manage workspace information and users from the settings sidebar. The image at the top is General settings. Logo and colors are under Theme. Email notifications are under Notifications.
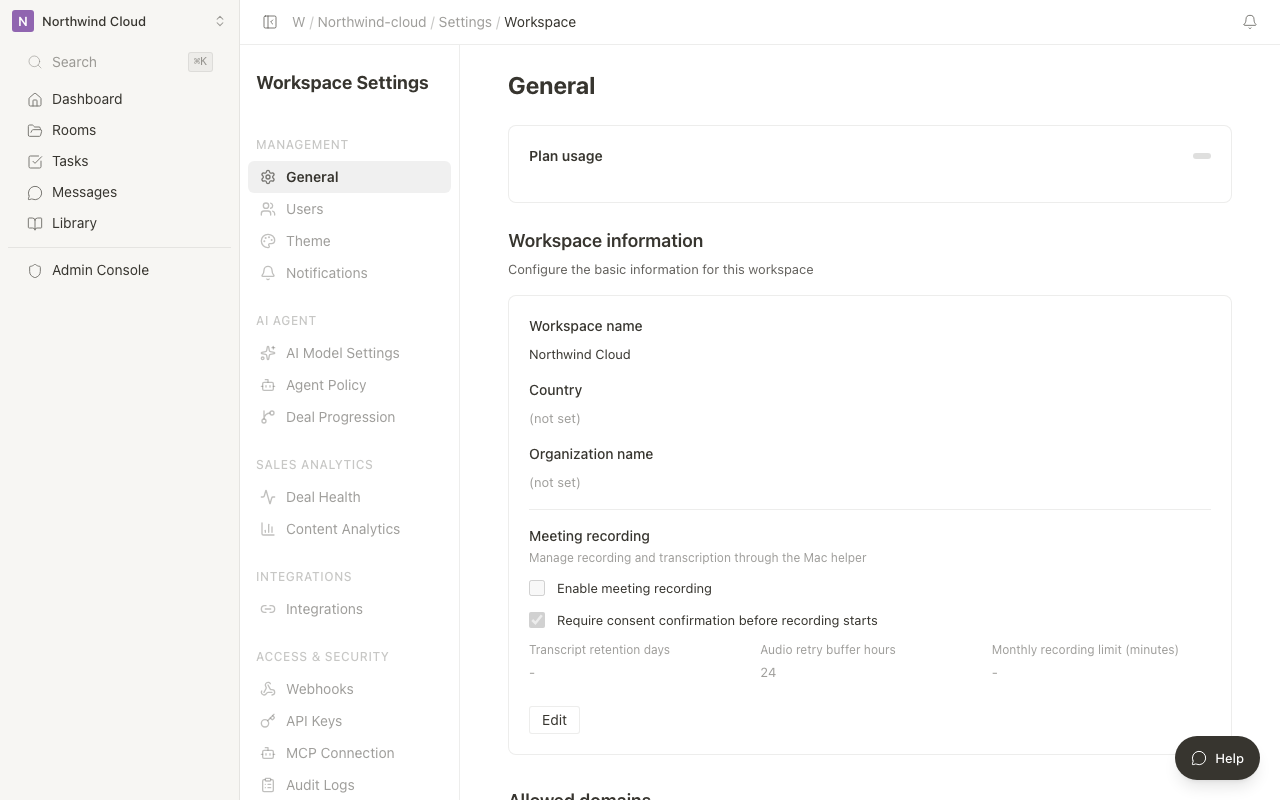
Open the settings page
- Click the workspace name at the top of the sidebar to open the menu
- Select Settings
The settings sidebar opens on the left. On a phone, the same items are in the menu row above the page.
Settings menu overview
Management
| Menu | Description | Detailed article |
|---|---|---|
| General | Workspace name, meeting recording, allowed domains | This article |
| Users | Invite members and manage roles | This article |
| Theme | Color palette, logo, sidebar color | Theme and Usage |
| Notifications | Email notifications | Notification Settings |
AI agent
| Menu | Description | Detailed article |
|---|---|---|
| AI Summary | Summary prompt | AI Summary |
| Agent policy | Autonomy level, skills, web search | Agent Policy |
| Agent skills | Company-specific judgment and prompts | Custom Skills |
| Client project progression | Phases, completion criteria, suggested actions | Client project progression |
Project analytics
| Menu | Description | Detailed article |
|---|---|---|
| Project health | Progress scores and alerts | Project health |
| Material intelligence | Scoring materials that move work forward | Material intelligence |
Integrations
| Menu | Description | Detailed article |
|---|---|---|
| Integrations | Slack, LINE, CRM | Slack / LINE |
| MCP | Connect AI tools to Terasu | MCP |
Access and security
| Menu | Description | Detailed article |
|---|---|---|
| Webhooks | Event notifications to an external URL | Webhooks and API keys |
| API keys | Programmatic access | Webhooks and API keys |
| Audit logs | Activity history (Enterprise) | Audit logs |
Subscription
| Menu | Description | Detailed article |
|---|---|---|
| Plan | Review or change the plan | Plan and billing |
| Billing | Invoices and the Stripe portal | Plan and billing |
| Usage | Resource usage | Theme and Usage |
If a member opens an admin-only page, nothing is saved and the page shows that they do not have permission.
General settings
- Select General from the settings sidebar
- Click Edit to change workspace information
- Click Save
Fields you can change
| Field | Description |
|---|---|
| Workspace name | Display name |
| Country | Location |
| Organization name | Organization |
| Default language for workspace notifications | Default language for notification email |
| Time zone | IANA time zone |
| Meeting recording | Enable recording, consent, transcript retention |
Upload the logo on Theme. There is no screen to delete the workspace.
Allowed domains
Users with email addresses on these domains can be invited automatically.
- Select General from the settings sidebar
- In Allowed domains, enter a domain such as
example.com - Click Add
- To remove one, click Delete on that domain and confirm
Adding your company domain makes inviting internal members smoother.
When allowed domains are set, you cannot invite addresses on domains that are not on the list. The restriction does not apply to external invitations.
Member management
Invite workspace members, change roles, and remove people.
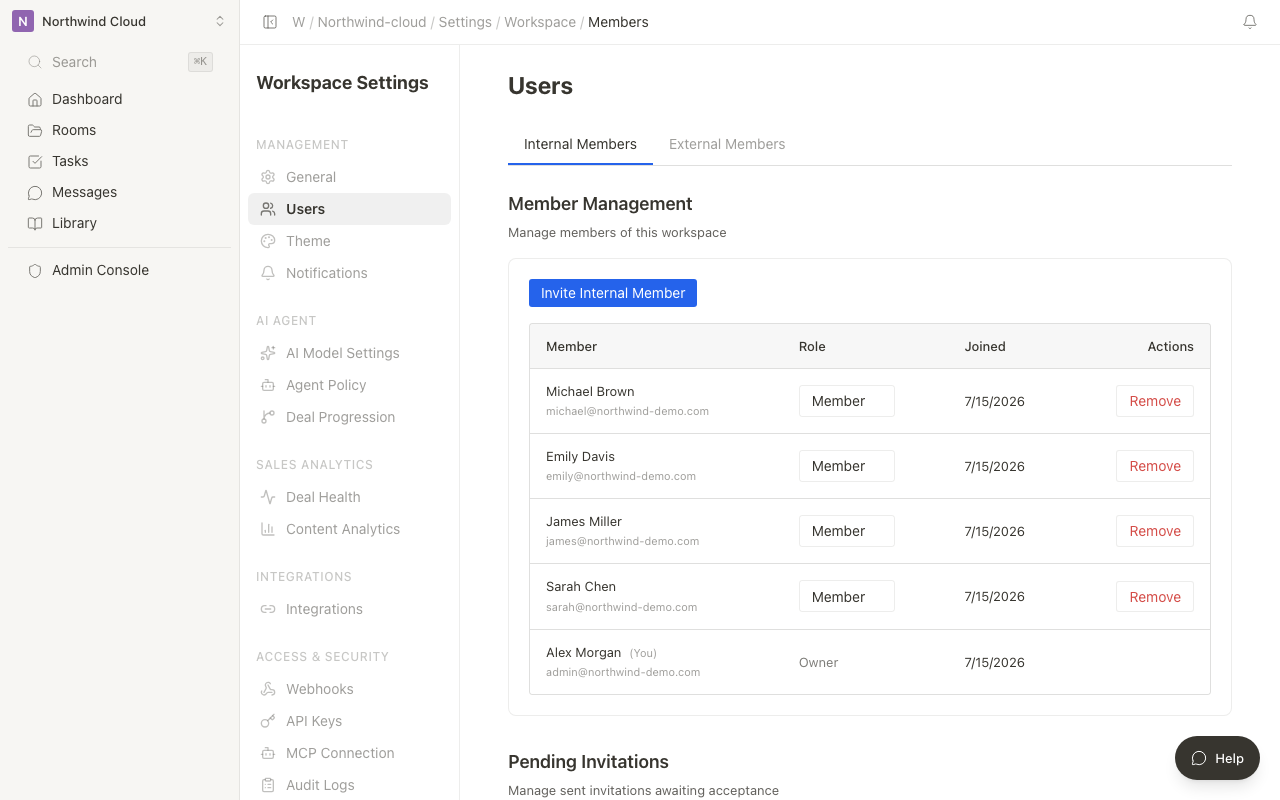
- Select Users from the settings sidebar
- Switch between Internal members and External members
Roles
| Role | Access |
|---|---|
| Owner | All settings, members, and plan changes |
| Admin | Invites, Room management, some settings |
| Member | Use Rooms and edit content |
Invite a member
- Click Invite internal member
- Enter the email address
- Choose a role
- Send the invitation
Pending invitations appear under Pending invitations. Click Revoke to cancel one. On a phone, table rows become cards.
External members
The External members tab lists customers and partners invited to Rooms.
Related articles
- Plan and Billing ManagementHow to check and change your plan and manage billing and usage
- Theme and UsageHow to set the workspace color palette, logo, and sidebar color, and how to check plan usage
- Managing Webhooks and API KeysCreate, test, delete, and revoke webhooks and API keys from workspace settings
- AI SummaryHow workspace admins edit and save the AI summary prompt
- Agent PolicyHow to manage the AI agent's autonomy level, built-in skills, and web search